Advisory Note

Please Note: This blog contains poorly painted toy soldiers that may offend those of an aesthetically sensitive disposition.

Monday 10 April 2023

An Age Undreamed of (Part the Second)


The slaying of a Priest of Mitra, one Sopious, by Stygian Assassins from the priesthood of Set, led to the raising of an army from amongst the loose affiliation of City States that makes up Corinthia. Once again it was that old warrior General Ilossmykies commanding the host that made the long march South. With orders to avenge the Church of Mitra, the Corinthian force aimed to destroy a Stygian Seminary just South of the River Styx' near to the City of Luxur.

Crossing war-torn Koth without incident, the Corinthians entered the rolling grassland of Shem.


Having received urgent dispatches from their spies in Corinthia, the Theocrats of Stygia sent a force into Shem to attack and delay their enemy, commanded by Bishop-General Pheerles.

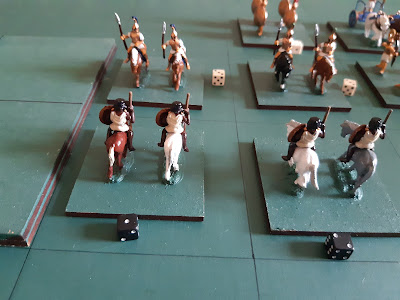
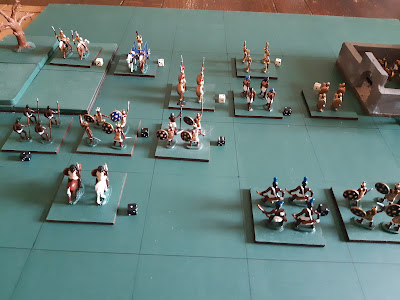
Ilossmykies and the advance guard were probably half a day ahead of the main bulk of the Corinthian Army, moving as it was at the speed of the baggage train. Arriving at a deserted Manor house, the General determined to await the arrival of the rest of his men. It was at this point that the Stygian force appeared over the horizon. Both sides quickly took positions, cavalry and skirmishing archers leading the infantry. The Stygians had a slight numerical advantage but were mostly light troops. The Corinthians were all heavy types. 


A few scenes from the battle follow. It was a fairly standard affair with both sides bashing away at each other, falling back, advancing again etc (apologies for the blurry pics)


The Stygians, although half being lightly armed and unarmoured, made a good account of themselves pushing the Corinthians to Exhaustion Point (set at 50%) first.


As the Great Beetle maneuvered the Golden Orb of the Sun behind the hills, the two sides withdrew. The Stygians had succeeded in delaying the Corinthian advance, as Ilossmykies now had to patch up his Advance Guard and possibly rethink his strategy while awaiting the rest of the Army, who were approaching judging by the dust cloud to the North.

Friday 7 April 2023

Another return to Hyboria?


Having discovered yesterday that there is going to be a specific Hyborian variant of the Portable War Game (PW), to be published in the Second PW Compendium (Ed. Bob Cordery), I've pulled out the boxfile of 20mm figures labelled "Hyboria" that I was preparing in 2020 (see Here). Mark Cordone is the author, and I'm really looking forward to trying the game.

I had forgotten that along with painting the Army of Corinthia, I'd also got some way with my Army of Stygia (the country South of the River Styx, full of sinister Set Worshipers). A few pictures follow for anyone who is interested in this sort of thing. The figures are from various manufacturers, some plastic and some metal.


Army of Corinthia - this was in 2020. Another 3 units of foot have been added


Army of Stygia - auxiliaries made of tribesmen from client states to the South of Stygia (Kush, Punt, Darfar etc)


 Stygian Heavy Infantry - the backbone of the Army


A Stygian Necromancer and "friends" - Robert Howard's Conan stories included a bit of magic though they are more Swords than Sorcery.

Looks like I've got enough for a game!

Thursday 6 April 2023

Mini Campaign using OHW Scenarios Part 2

 Retreating back to the border after their raid into Red territory, Army Green find their way blocked; they must fight their way home. The successful counterattack by Army Red necessitated the playing of OHW Scenario 13 "Escape". Green must exit at least 3 units by the road to succeed.

Battle 3

At first glance it appears that a single battalion of infantry stand in the way of Army Green.


More units appear on the hill as the Green column advances.


And more...


Green's Commander, leading his cavalry, clears the last of Red's infantry from the road. The way is clear. Or is it? A further Red unit appears to replace it.


Despite being shot at from their rear, Green's infantry concentrate their fire forward before their cavalry charge in again to finish off the survivors 


Once again the road is clear and an orderly retreat resumed, giving and receiving fire


Green's escape ended the War. Red was hampered by a lack of cavalry and some terrible dice throwing.

Thanks to Martin Smith for sharing his Mini Campaign matrix which is shown with the permission of its author but remains Copyright M.Smith.


Monday 3 April 2023

Mini Campaign using OHW scenarios Part 1

 A few days ago Martin Smith kindly sent me the plan of a Mini Campaign he has prepared using Scenarios from Neil Thomas's One Hour Wargames. The following summarizes the first two games with the concluding game to follow soon (I hope).

The Campaign is map-less, so naturally I thought I'd add a map; for colour.


   There has been a diplomatic incident involving the Kingdom of Azez (Red) and the Republic of Ora (Green); both sides have sent troops to the border but in their haste the forces are arriving piecemeal. ( I rolled for a choice of Game 1 from 3 scenarios offered and landed No.17 "Encounter"). For rules I'm using a house version of the Portable Wargame prepared for OHW (there's no Exhaustion Point, to reflect the zero morale rules in Thomas's book).

Battle 1

The sun was barely up over One Tree Hill when the two forces began arriving. Red was the first to get boots (or hooves anyway) on the objective.


Red's troops began appearing each turn and they quickly dominated the hill though the slower arriving Greens persistently attacked.


As evening fell it looked like Red would hold the hill, but as the sun slipped below the horizon, a gallant counter attack from Green stormed the objective. Red was reduced to such a small force that their commander was forced to slip away under cover of darkness or face annihilation. 


Green's victory led them to take a border town near a strategic bridge; controlling both is the key to Scenario 18 "Counter-Attack".

Battle 2A

Red had one unit holding the bridge (the rest of his force would arrive on turn 3). Green held the town and advanced towards the bridge. Due to poor reconnaissance, Green was unaware of the two fords (marked by patches of sand).


 As the main Red Army arrived Green held both of the objectives; the counter attack had to begin at once.

Whilst attacking the bridge, Red made use of the Fords which the Green Commander stubbornly refused to notice, even when he was being fired on by Irregulars crossing the river on one of them.


In a daring move, Red's Commander out flanked Green and personally led an attack, firstly destroying Green's artillery and then attacking the Town Garrison.


Late in the day, both sides had lost their Commanders and casualties were mounting. 

Red held the bridge and the town was surrounded on three sides. This time it was Army Green who were forced to withdraw from the field...