Advisory Note

Please Note: This blog contains poorly painted toy soldiers that may offend those of an aesthetically sensitive disposition.

Saturday, 10 August 2024

Crossroads*

 *Please Note: This post refers to the Battle at the Crossroads and not the soap-opera set in the West Midlands of the UK, in case you feel cheated.

Today's Portable Wargame was based loosely on a scenario of Martin Rapier's that can be found here.

Setting

Winter has passed and the war between Red and Green is poised to recommence. Green attempts to preempt a Red invasion by attacking a supply line at a strategic Crossroads in the centre of a village. Red has possibly not stationed troops of sufficient quality guarding this vital position...


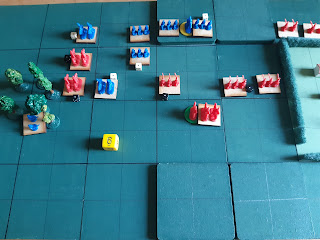
Grey squares indicate BUA (village and a farm). The two hills are heavily wooded and only passable by Light Infantry. Red starts with 2 infantry units rated Poor at Zone A, and a unit of infantry in the village. The roads are barely passable due to melting snow and heavy rain and confer no movement bonus. When the Poor class units first come under fire they must roll a d6 each turn - a 1 means they retreat at normal speed to the village. When they take their first hit they must roll d6 - 1,2,3 means they retreat as above. Once in the village they behave as per Portable Wargame rules. Green Army arrives on turn 1 (all on South base line). Red's remaining force arrives on North baseline on Turn 2. Green's objective is to occupy the Crossroads at the end of the battle.

 Game

Note: the purple dice remind me these units are Poor quality
Green's attack begins at once

One Red unit retreats but the other stubbornly resists

Green's cavalry bypass the occupied farm

Green's cavalry attempt to out flank the Red defenders

The farm defenders finally retreat

Green starts the assault on the village

The attack is slowing as Green takes hits

Everything is thrown at the defenders

Heavy losses for both sides have reduced them both to EP

The Poor quality troops, naturally, held out longer than expected, tying up Green's forces (shades of Sittangbad). I might try this again using OHW rules that would allow a fight to the last man, though the troops in the village are still going to be hard to winkle out. 

Monday, 5 August 2024

OHW31

 A further extract from the memoirs of General Wells recalls how, as a young Brigadier General, he was charged with holding the two villages of West and East Hampton...

This scenario is the creation of Disgruntled Fusilier and can be found here. The game was played with a variant of the Horse & Musket rules from OHW. The two armies were picked randomly using the table in OHW - both sides rolled a 2 and fielded  3 units of Line Infantry, 1 of Artillery and 2 of Light Infantry. According to the scenario instructions Red always moves first. Victory for Blue can only be achieved by holding both villages, which I assume means Red can win by holding one village at Turn 15.

The battlefield with West Hampton in the West...

Early morning and the assault of West Hampton begins

Red artillery arrives

General Wells arrives but so do more of Army Red

Blues Line Infantry have been wiped out.
The Light Infantry quickly replace them.

As the fight for West Hampton grinds on, Red Line Infantry appear to the NE

They are followed by a Blue Light Infantry unit 

Midday: Red is now attacking both villages

General Wells rushes to replace the fallen Light Infantry in West Hampton
(East Hampton is secure with the destruction of Red's force)

Too late! Red occupies the village

Blue's artillery has finally arrived and manoeuvres towards the action

General Wells and Staff fall back towards East Hampton

Day's end: West Hampton is firmly in Red hands.

The Battle of the Hamptons represents the first defeat in the career of General Wells.
A nice scenario to play; my compliments to the author, Mr Fusilier.

Saturday, 3 August 2024

Redoing

 The Fiddler's Bottom game has been replayed, this time using my original 3 hit version of OHW Horse & Musket, plus a bonus for embedded Generals. This time the attacking force out numbered the defenders. Again no specific artillery units were present. To win Red need to exit 3 units within 10 turns.

The opening position

Early cavalry clashes have taken their toll for Blue

Red's Infantry move forward cautiously.
Red cavalry have brushed aside the Blues.

Red in a position to exit three units

Red almost reaches his objective, luckily as casualties are high 

Red achieves his objective and is victorious!

Sunday, 28 July 2024

Blocking

 The following action was based on a game that featured in Wargame Tactics by Charles Grant, namely The Battle of Fiddler's Bottom. As in the original, neither side has artillery support and the two sides are of equal strength and composition; in this case, 6 units of line infantry, 4 units of cavalry and 2 units of Light Infantry. The rules were an experimental variant of OHW rules. Units initial dispositions were based on the original.

Situation

Army Red has sent a relief force to break the siege of a nearby town. Their route is blocked at Pleasant Valley by a force from Army Blue. The objective for Army Red is to exit at least six units (half of their force) across the North edge of the battlefield to form a viable relief force. The game length is 10 turns.

Pleasant Valley - The Battlefield

 The Battle

General Wells (Army Blue) had been ordered to block the approaching Red relief force at any cost. Situating himself on the high ground at Grimstone Ridge, which commanded a fine view of the valley and the large farm complex of Fiddler's Bottom, he ordered his cavalry to form up on his right and the Infantry to hold the ridge. He dispatched one unit of Light Infantry to the wooded area known as Grant's Copse in case the enemy should attempt to slip any troops past to the West. Assuming that the hedges and buildings in the farm area would slow down any units sufficiently, he determined that no troops need be sent there.
General Orderves (Army Red) planned to throw everything forward and smash his way through the blocking force.

Opening positions

Contact!
Red's Light Infantry scramble into the farm

Blue holds back the tide

Blue's cavalry under pressure

Red's Light Infantry have passed through the farm...

and exit the battlefield. General Orderves leads his Guard Cavalry into combat

A Red Infantry unit has also exited and the cavalry look like they may too

Disaster for Red! Too many losses make victory impossible

General Orderves flees the field. Army Blue victory.

Had Red used his Light Infantry to engage the enemy before exiting the outcome may have been different, then again the dice may have fallen differently... 
A fun scenario, however this rule variant proved to be a bit too fast to provide a truly satisfying game, though some elements will be retained. On to the next battle.

Friday, 26 July 2024

Stand

 In which, the retreating Albionian force crosses the river into their own territory (pursued by the Uqbalians), and turn to make a stand. The surviving cavalry have been sent to get help.

Game 5: Fighting Retreat

The Albionians have crossed the river and are heading for the hill
The green bit is impassable wetland - there is a ford at each end of the river

The Army of Uqbalistan begins to cross the river

The Rifles turn and fire 

The Albionians open fire as their attackers assemble

The attack is underway by midday 

Despite putting up a stout defence, the Albionians are suffering

A Last Stand?

Both sides reach Exhaustion Point

Neither side had total control of the objective (the hill) when the bugles of the approaching Albionian Relief Force were heard. The force from Uqbalistan retreated across the river having driven the colonial troops out of their land, and leaving few to recount the tale of their disastrous mission.

The Umpire generously split the points for the final game between the two sides as neither gained complete control of the objective.

Final Campaign Scoreboard: KU 8.5 AAU 6.5

Tuesday, 23 July 2024

Flanked

 The retreating Albionians are nearing the border with their own territory, and the end to their disastrous adventure pursuing the Slave Traders. The road ahead, however, seems to be blocked. The objective of this scenario is for the Albionian force to exit three units via the road.

As they approach the enemy, a scout rides up to warn the Albionian Commander that a larger force of Uqbalistanis are approaching from the Right Flank.

Game 4: Flank Attack (1)


Retreat? No! A strategic withdrawal (at the double)

Vulture's eye view of the two forces
A Line Infantry battalion is left to counter the flanking force

They prudently withdraw under heavy fire

More units get drawn into the fight on the flank

The Dragoons have smashed through the road block!

The Guards and the Rifles prepare to follow the Cavalry!

The objective achieved, the Line Infantry and the MacGuffins are left to fight their way out

and succeed in extricating themselves from their exhausted foe. 

Campaign Scoreboard: KU 6 AAU 4

The surviving Albionians march towards the nearby river crossing that marks the border, hotly pursued by a fresh force from the Kingdom of Uqbalistan...